

Table of Contents
Introduction:
Welcome to my dropshipping with Shopify and oberlo tutorial. In this post, I’ll show you step by step with pictures on how to set up your Shopify store and start dropshipping with oberlo. At the end of this post, I’ll be making a test order to show you how to fulfill an order with oberlo. Also, I’ll be showing you how to set up a Facebook page for Shopify and how to run Facebook ads for the Shopify store. This is a packed tutorial so make sure you don’t miss any part it. If you have any questions or challenges while creating your store, do let me know in the comment box at the end of the tutorial and I’ll be glad to assist you.
What Is Shopify, Dropshipping, Shopify Dropshipping:
SHOPIFY is an eCommerce platform designed for creating an online store. (Simple right?). If you sell goods or products offline or own a physical shop, you can also reach more customers with an eCommerce store created with Shopify.
DROPSHIPPING: This is simply the process of selling a product without seeing or handling the product physically or by yourself. In other words, you act as the middleman between the manufacturer (supplier) and the buyer.
SHOPIFY DROPSHIPPING: This involves using the Shopify platform and Oberlo app to dropship. That is you create your store on Shopify, list your product, a buyer orders for it from your store, you order it from your supplier and your supplier ships the product to your buyer SIMPLE! You might be wondering “How do I make my profit? You simply list the product at a higher price. For example, if the manufacturer is selling for $5, you list the product on your store for $19.99 (some products are shipped for free) but either way, you consider that when pricing it on your store.
How To Sign up To Shopify
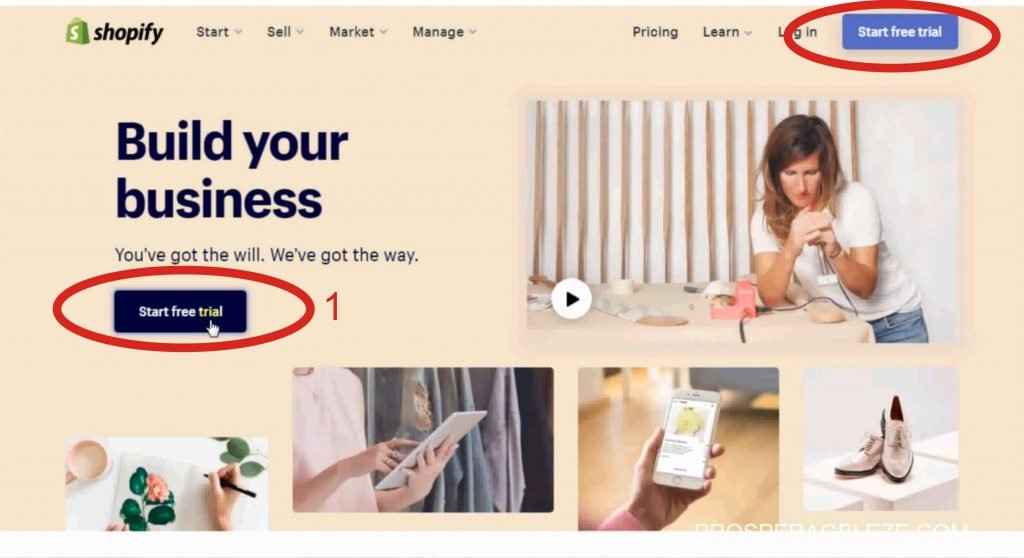
To get started with creating a store with Shopify, click here >> akprosperblog.com/shopify to get a 14 days trial.
- Click start free trial
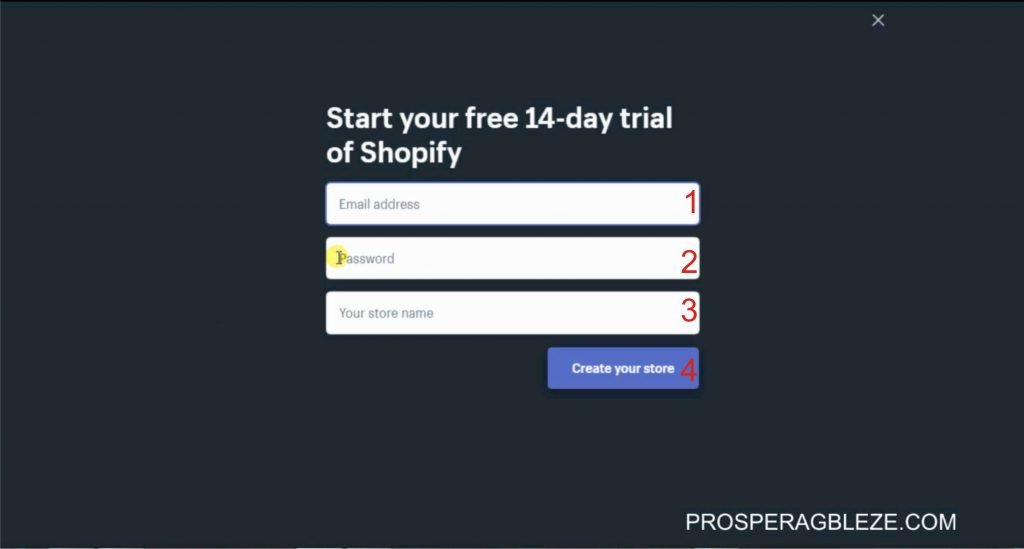
- Enter your Email address, password and store name. Note: the store name will also be your store URL.
- Click Create your store
- On the next page, you fill in your details
- Click enter my store

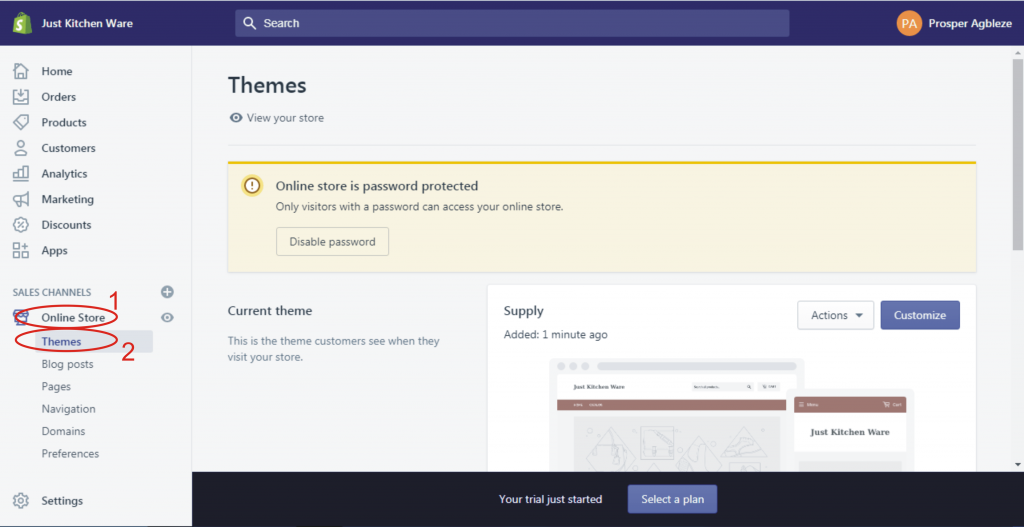
How To Add A Theme In Shopify:
In this tutorial, we’ll be using a free theme called Supply
- Click “Online Store” It’s on the left side of your screen
- Click “Themes” from the dropdown
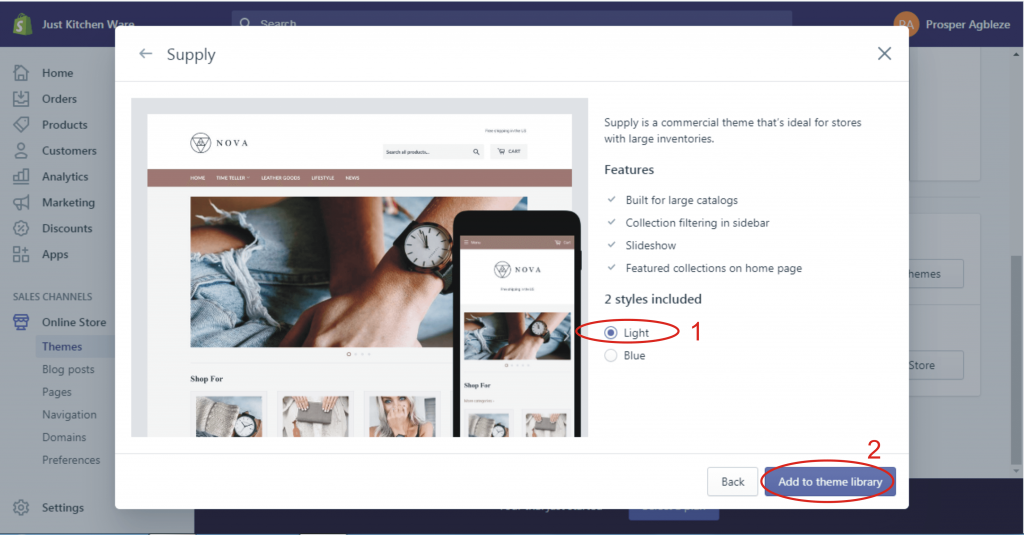
- On the themes page, click explore free themes (Shopify also have paid themes)
- Search for “Supply” and select light style
- Click “Add to theme library”
- Ones the theme has been successfully added, scroll down, click on action, publish then confirm
How To Install Oberlo App:
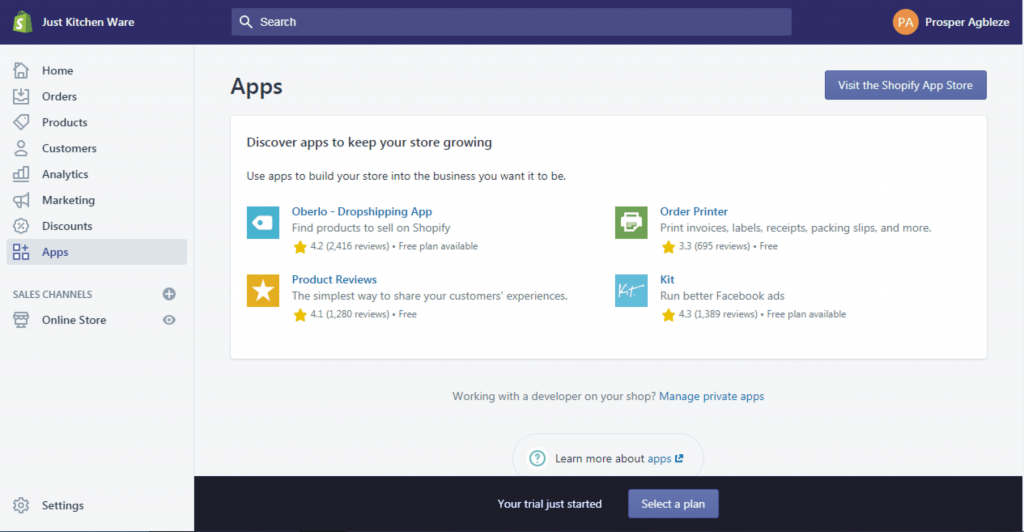
- On your dashboard, click Apps
- Oberlo is one of the most used Shopify apps so it will appear on the app dashboard.
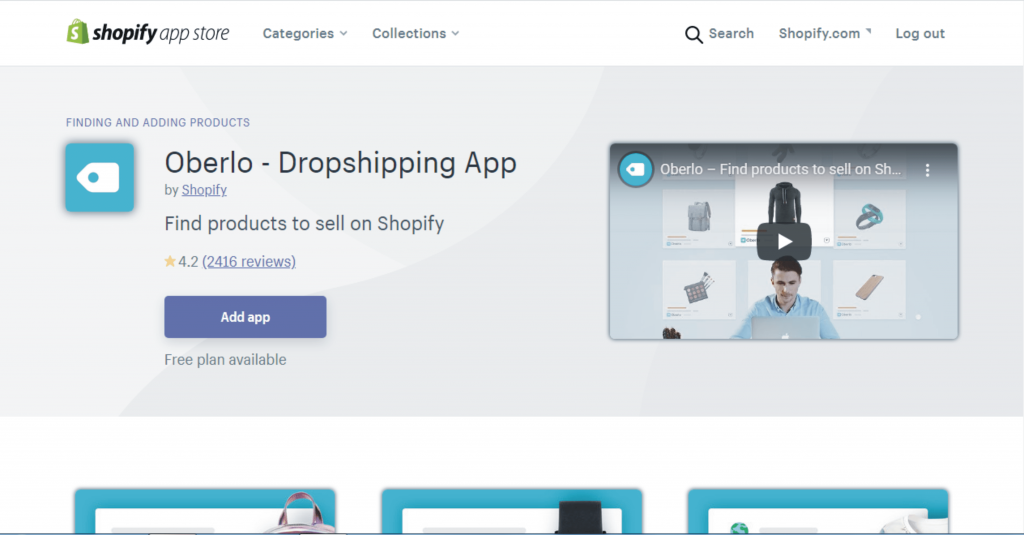
- Click on the app “Oberlo – Dropshipping App”
- On the next page, click add app
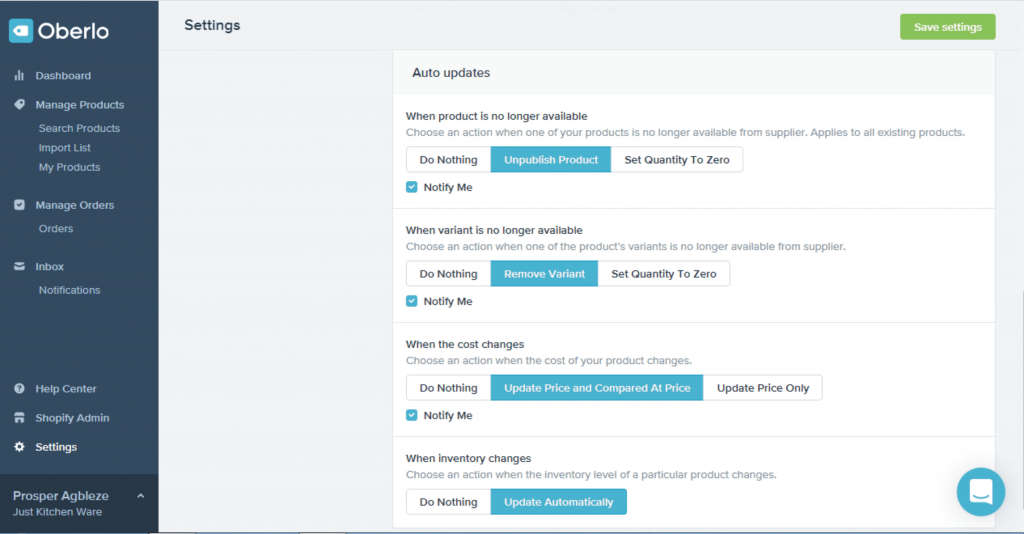
Important Settings In Oberlo:
- From the Oberlo dashboard, click on settings
- Select the options as seen in the picture below
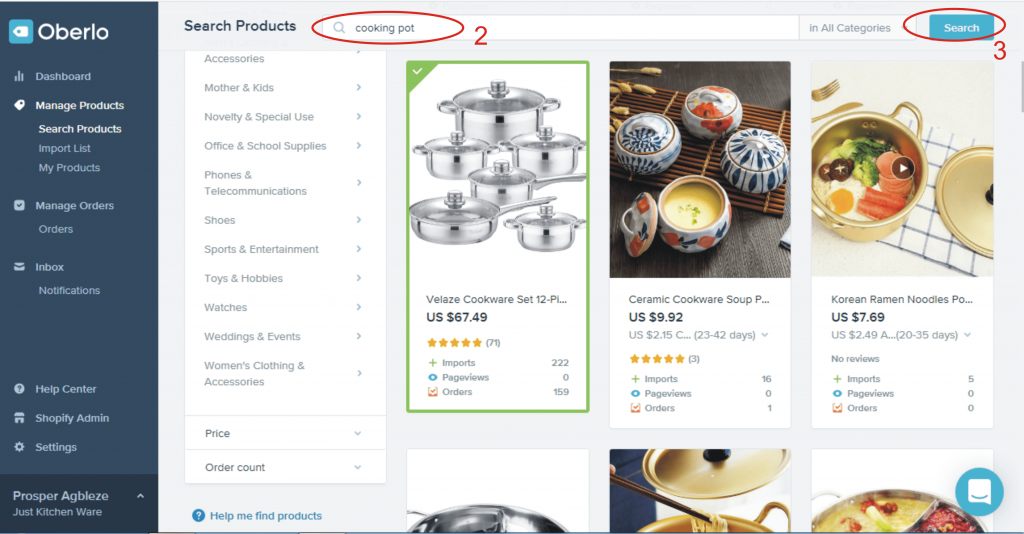
How To Search And Import Products From Aliexpress With Oberlo:
- First, install the Oberlo extension for chrome
- From Oberlo dashboard on the left, click “Search Products”
- Enter the name of the product you want to search in the search box, select the category (optional) then search
- Ones you find a product you want to add, hover over it and click “Add product to import list”
- Repeat the above step to add as many products as you wish

NOTE: Pay attention to the product reviews and orders. Select the product with more orders and reviews. Avoid products without orders.
- Ones you’re done adding products, from Oberlo dashboard, click “Import List”. The total number of the product you imported will appear next to import list
- For each product, take your time to change the title (Keep It Short and Simple), add a description, select the variant (on the variant section, you’ll be able to see the cost and shipping of the product and set how much you want to sell it on your store) and images you want.
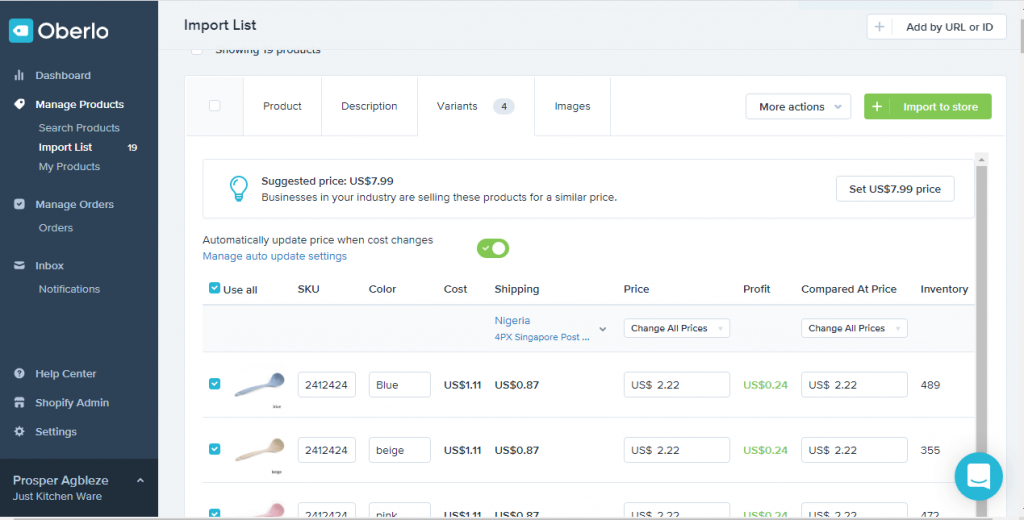
Tip: Avoid images that are branded with the manufacturer’s name or logo.
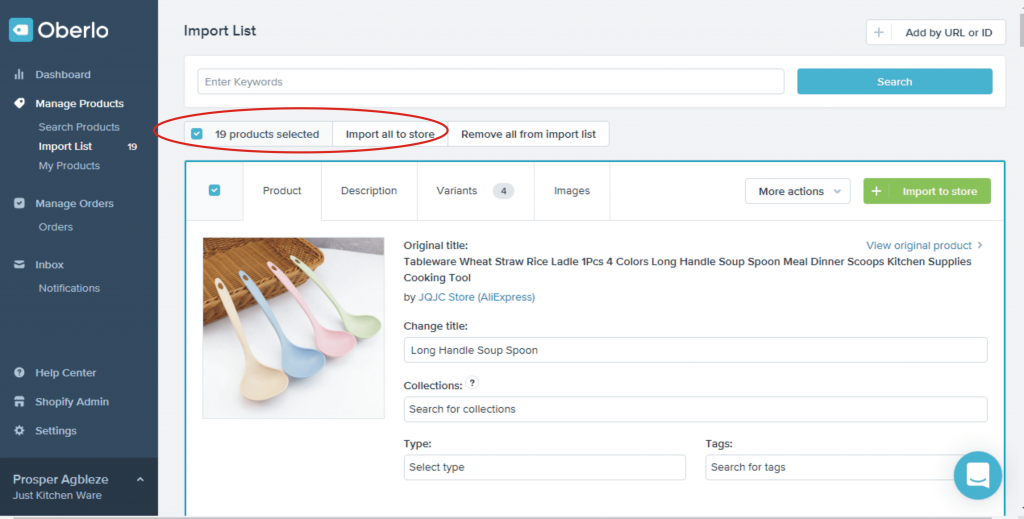
- When done select all the product and click “Import all to store”
- Head over to your Shopify dashboard, refresh the product page and you’ll see the products there
How To Add Collections To Shopify:
Collection simply means grouping similar products together.
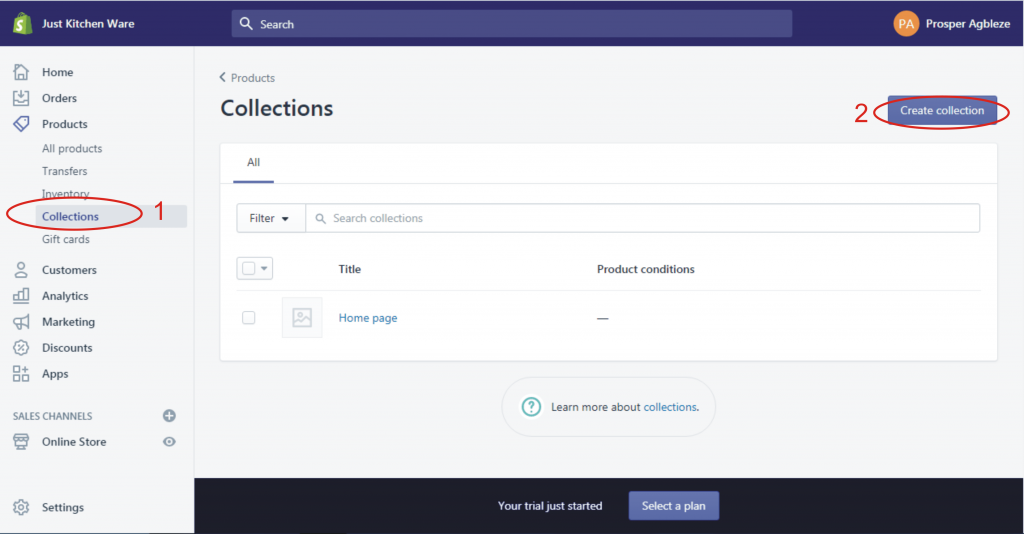
- On your dashboard, click products
- Click collections >> Create collection
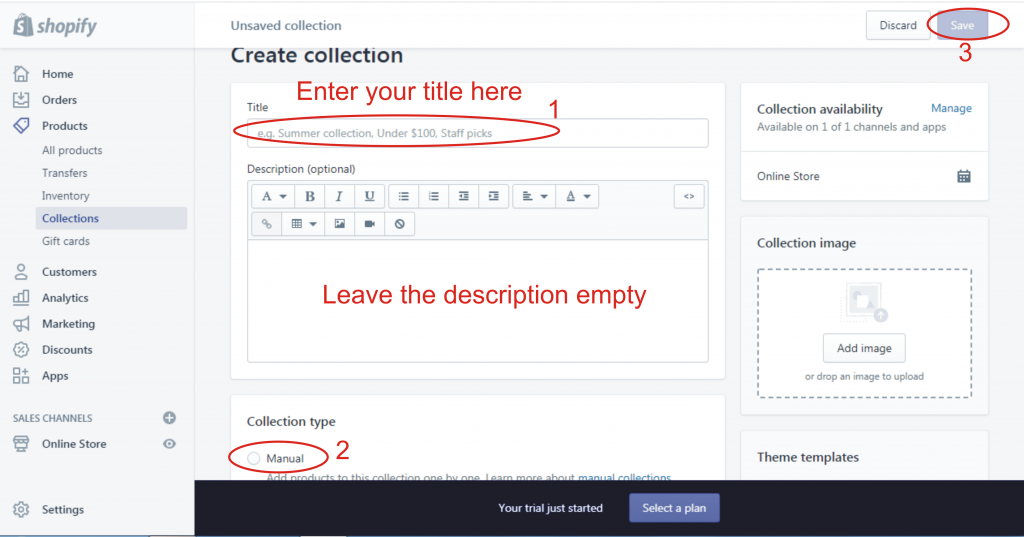
- Enter the title, description, and other things are optional
- For collection type, select manual then save
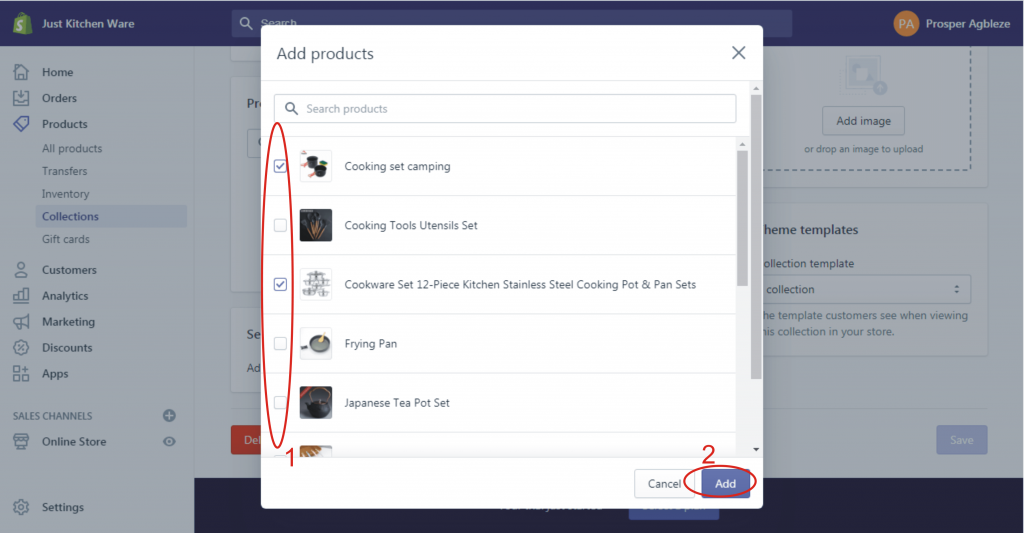
- To add a product to the collection, when the page loads, scroll down to products, click browse, select the products you want to add to the collection then click add
How To Set Up Shipping In Shopify:
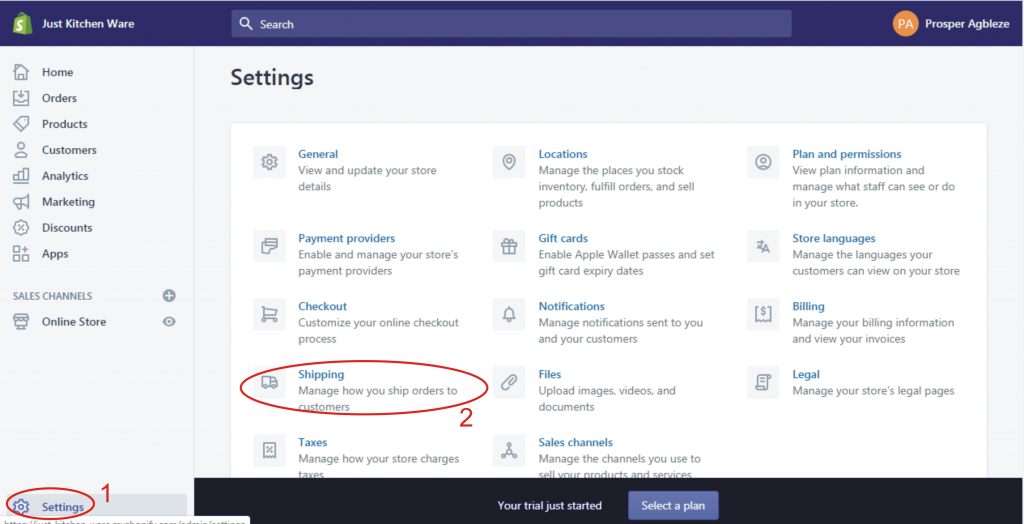
- On your dashboard, click Settings at the lower right
- From the list of settings, locate shipping and click on it
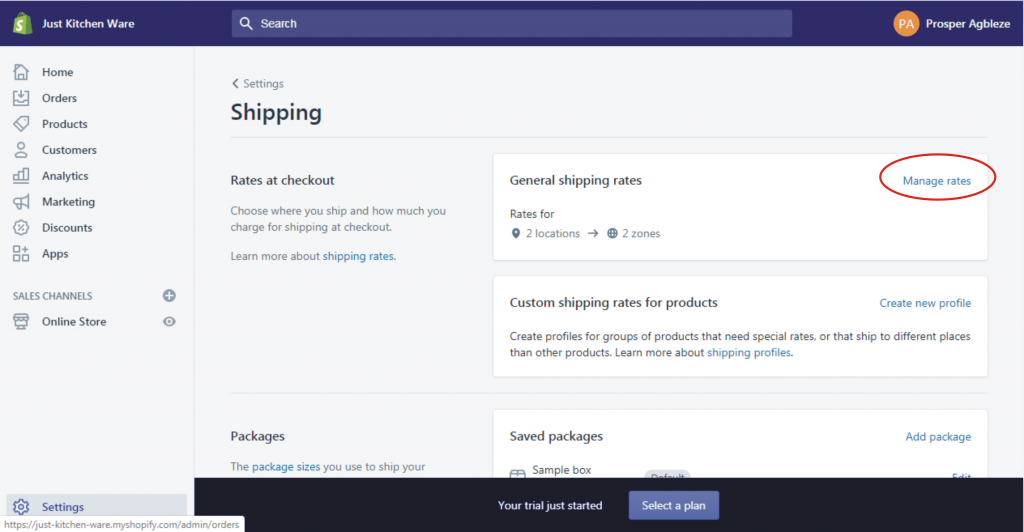
- Set your shipping origin that is where you’re shipping from. By default, your store address will be your shipping origin but you can change it
- Set your shipping zone, that is countries you will be shipping to
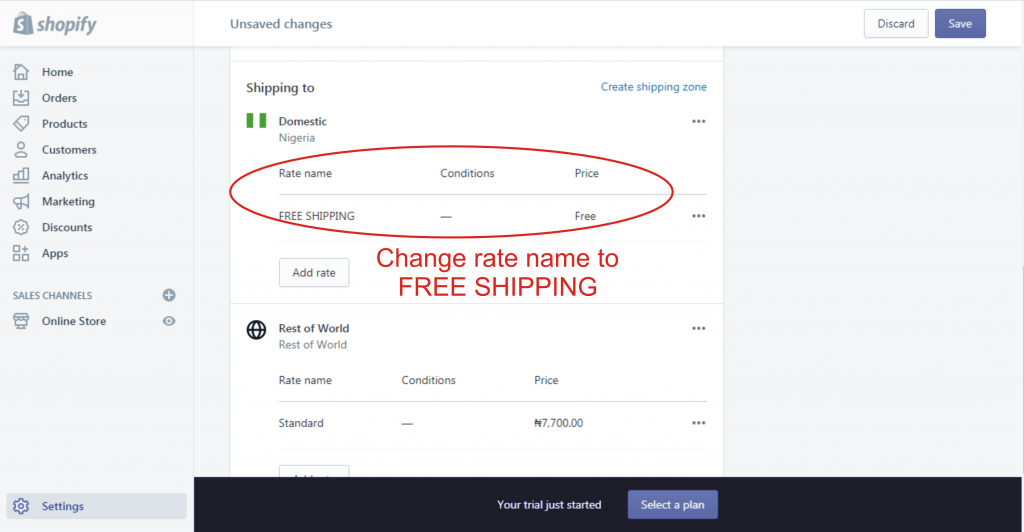
- For shipping rate, change the rate name to free shipping and for the price, make it free. In dropshipping, offering free shipping helps increase sales. Just add the cost of shipping to the price of the item before listing it
- When done, click save
How To Setup Payment In Shopify:
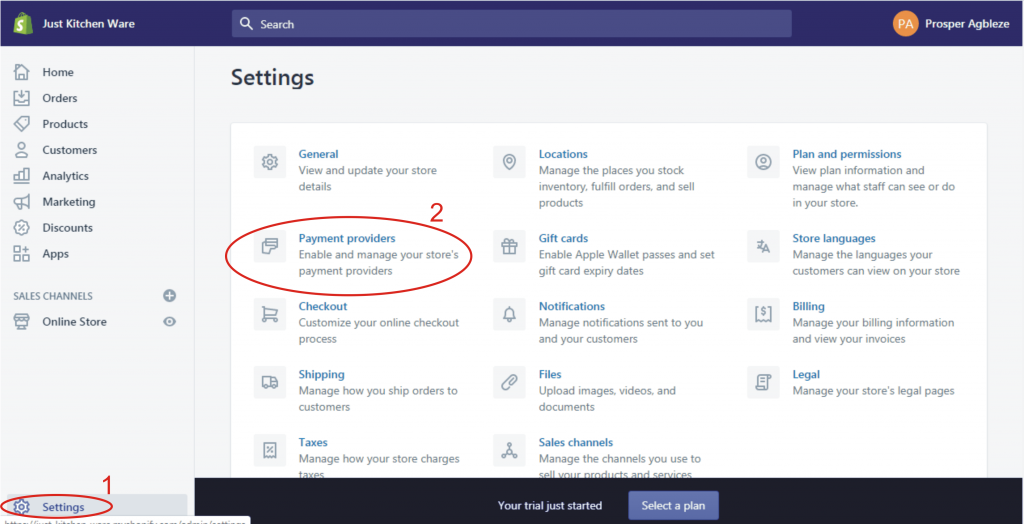
- On your dashboard, click Settings at the lower right
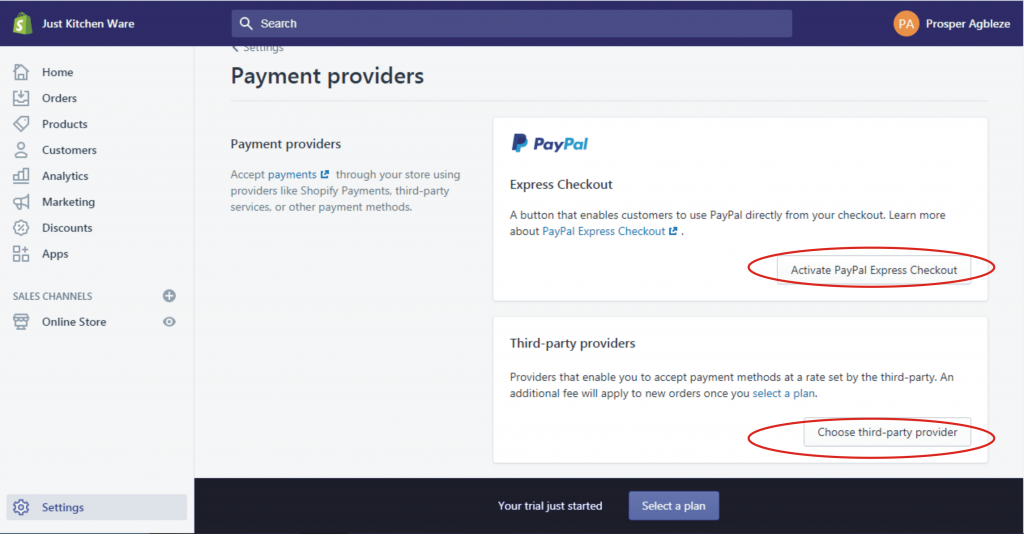
- From the list of settings, locate payment providers and click on it
- Select the payment method you want to use on your store like PayPal, credit cards, cryptocurrency, cash on delivery (COD) etc. To accept credit card, click “Choose third-party provider” and select from the list of payment gateway available and fill in the required details
How To Setup Checkout Page In Shopify:
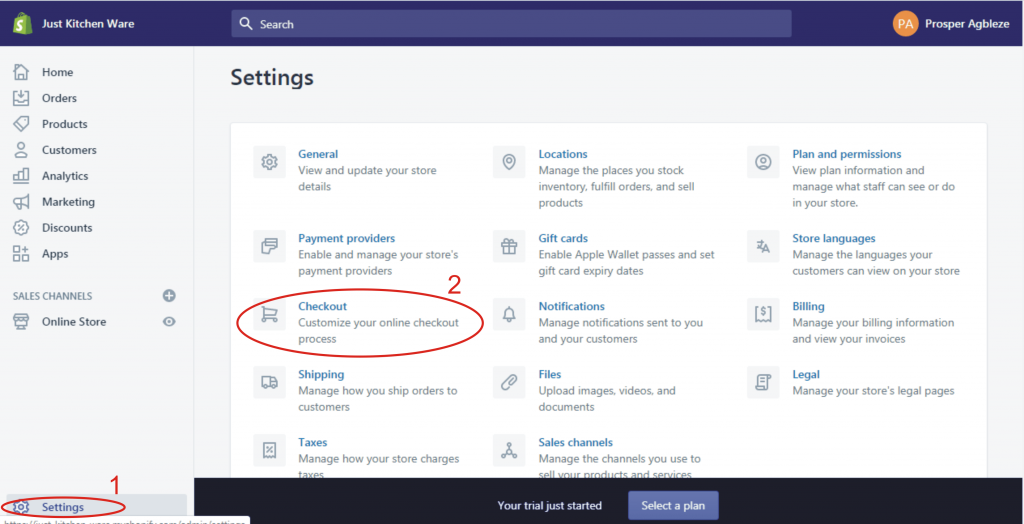
- On your dashboard, click Settings at the lower right
- From the list of settings, locate checkout and click on it
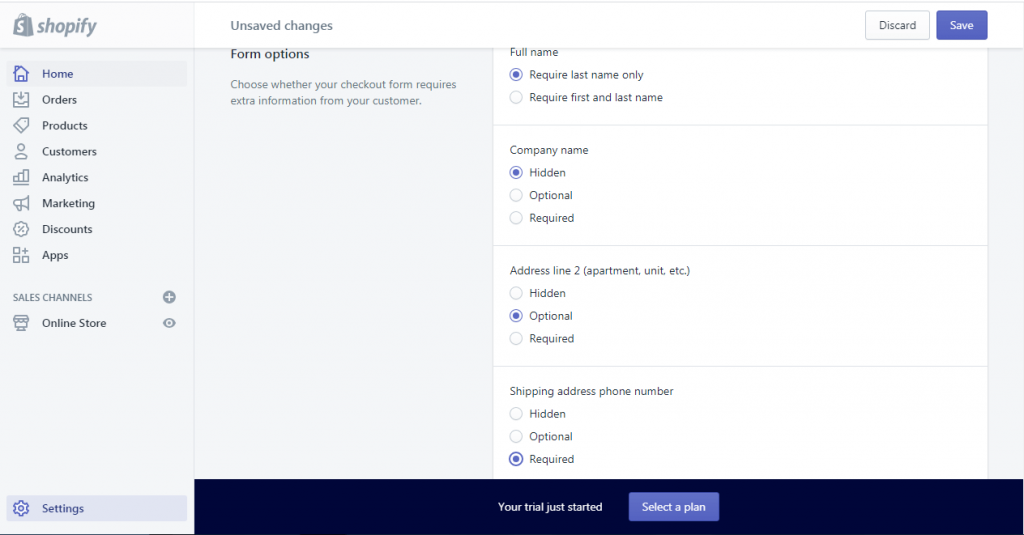
- For “customer accounts” makes it optional
- For “customer contact”, select the first option
- For “shipping address phone number, select required.

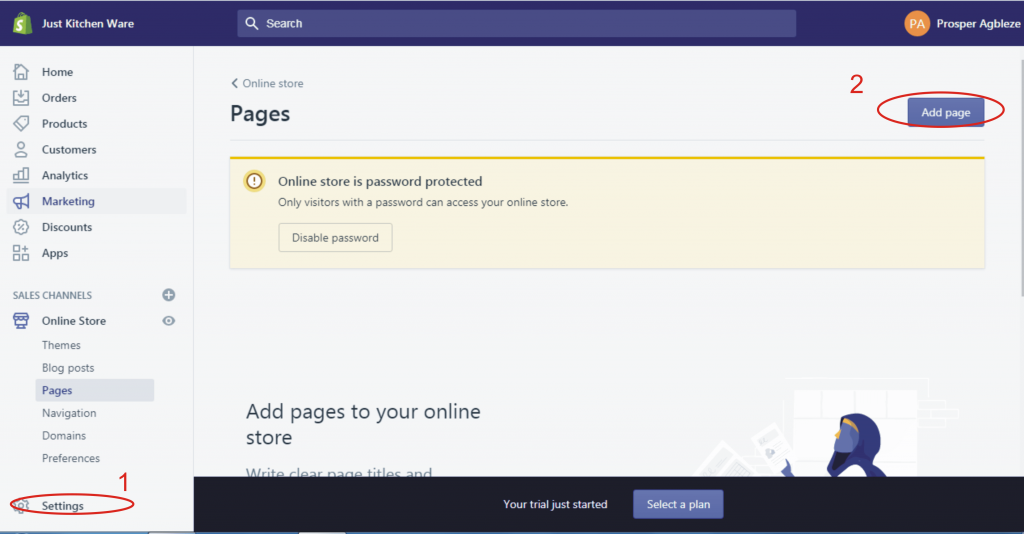
How To Create Pages In Shopify:
- On your dashboard, click Online Store >> Pages >> Add page
- Enter your page title and description then save
- For the contact page, enter your title, you don’t need to add any content in the description. At the right, you’ll find template suffix, click on it and select “page.contact” then save. This will automatically create a contact form for your contact page
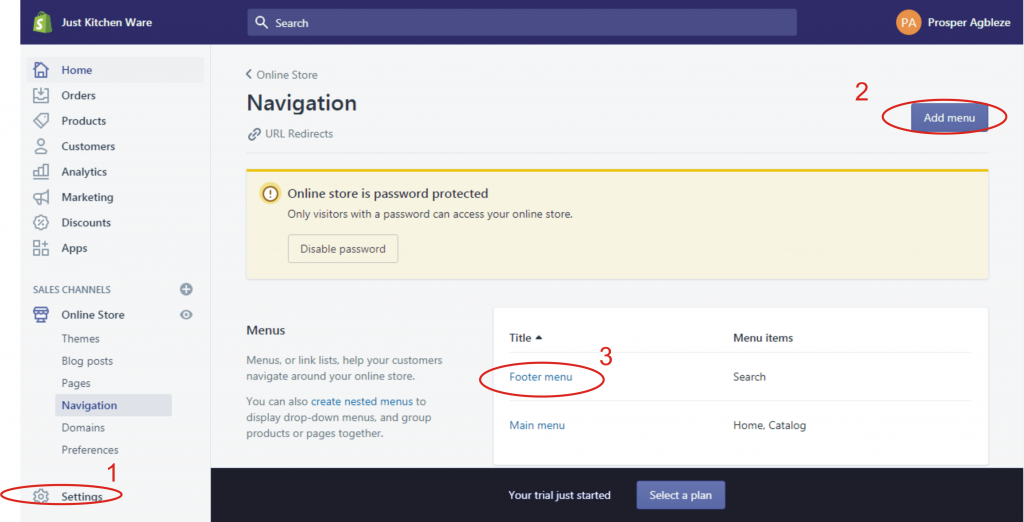
How To Create Menu In Shopify:
- On your dashboard, click Online Store >> Navigation >> Add menu
- There are two types of menu; footer menu and main menu
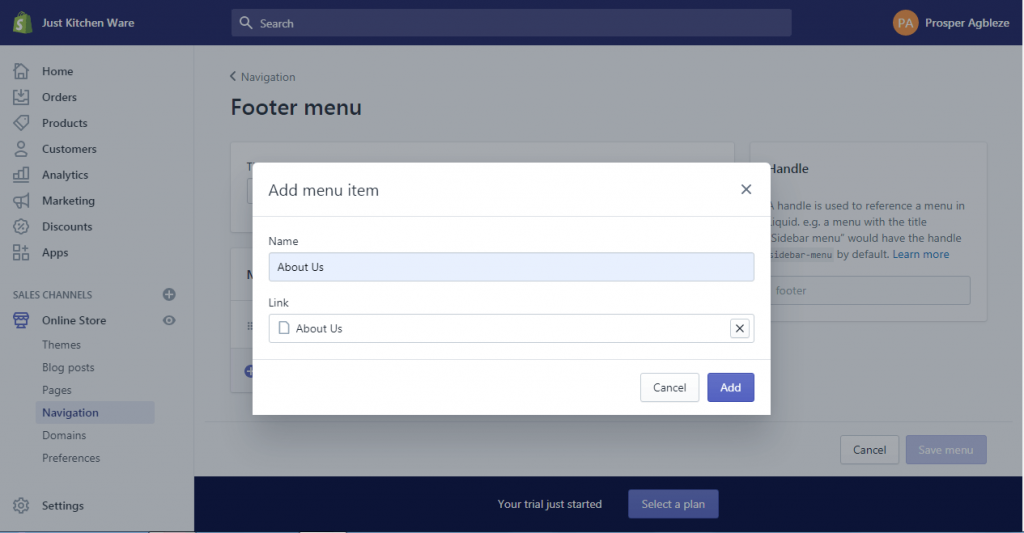
- Starting with the footer menu, Click footer menu >> Add menu item
- Enter the name of the page you want to add, on the next row, click link >> Pages and selected the page then click add. You can also add collection, product to the menu. Just select it in the link row
- Repeat the process to add other pages to the footer menu
- When done you can rearrange the menu the way you want by dragging it up or down
- Follow the same step to create the main menu
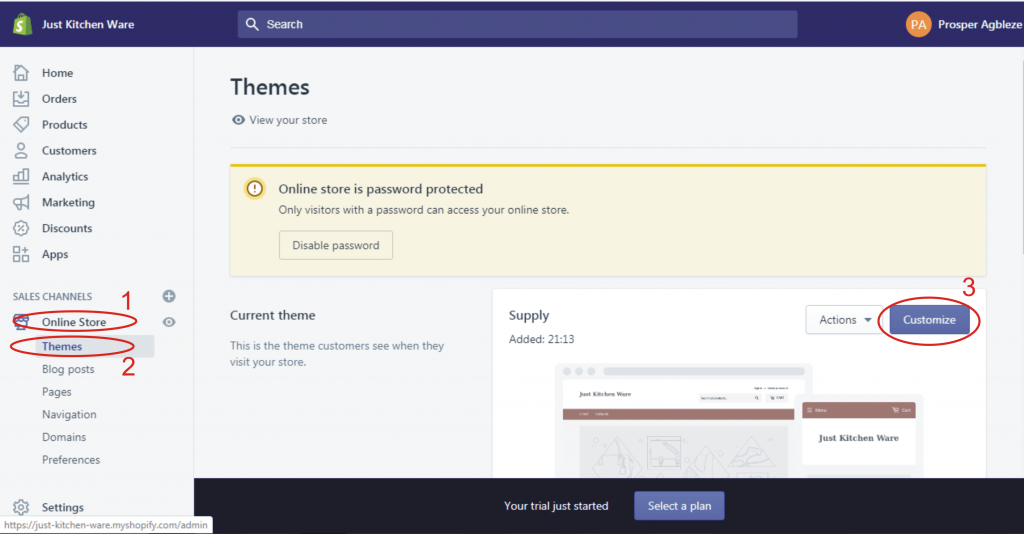
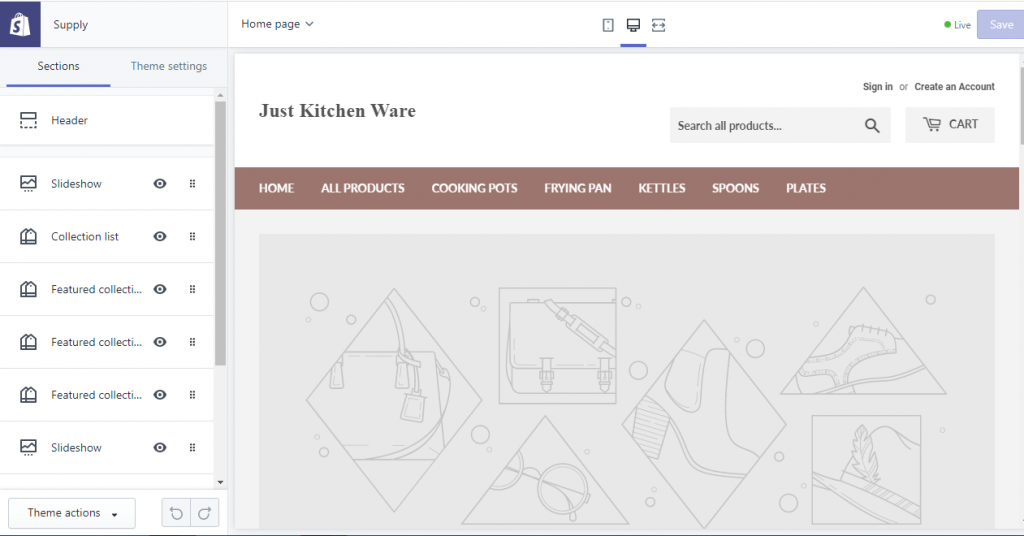
How To Customise Shopify Homepage:
- On your dashboard, click Online Store >> Themes >> Customize
- customize section is where you arrange each section of the homepage including other theme settings like logo, typography, colour, size, footer widget etc
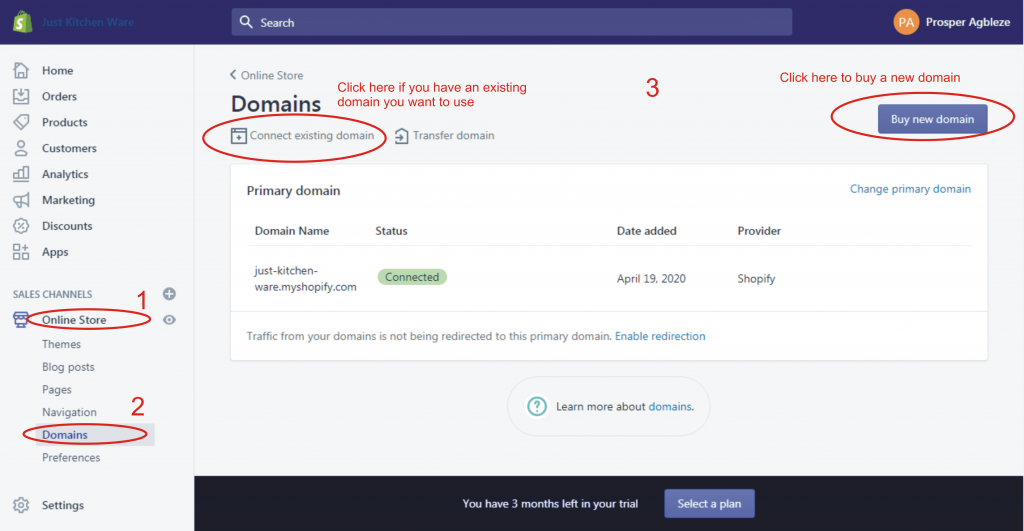
How To Add A Custom Domain In Shopify:
By default, your domain name will be formed from your store with a dot myshopify extension. This is not ideal for a store as it’s not SEO friendly and it will be difficult for buyers to remember the store link. To get a custom domain, follow the steps below:
- On your dashboard, click Online Store >> Domains
- On the domain page, you can either “Buy new domain” or “connect an existing domain” that is if you’ve bought a domain from other registrars like NameSilo, NameCheap, Siteground, etc you can connect it to your Shopify store when you select the “connect an existing domain” option.
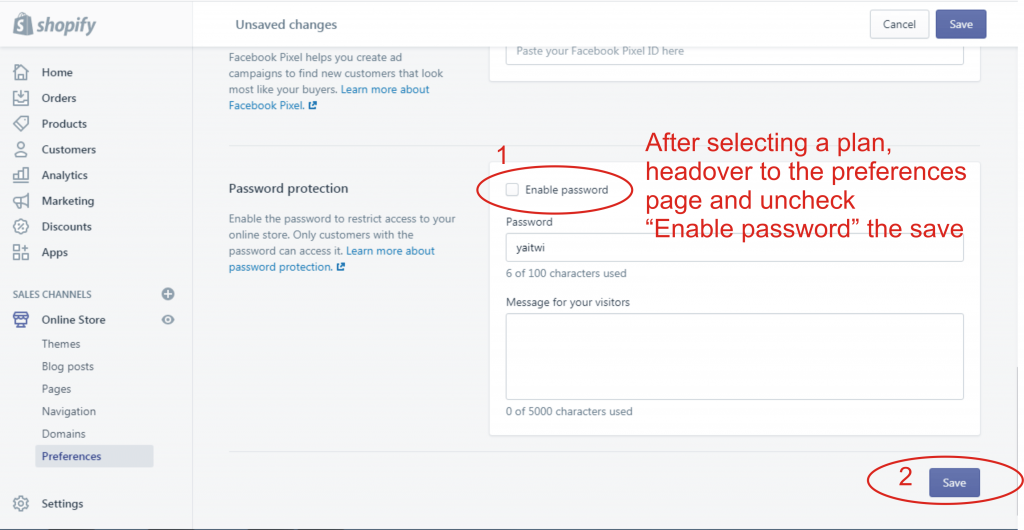
How To Pick A Plan And Remove Store Password:
To start taking orders on your store, you’ll need to pick a plan as this will enable checkout. If you don’t choose a plan you can’t checkout. Also, the store will be password protected, meaning your store will be displaying a coming soon page
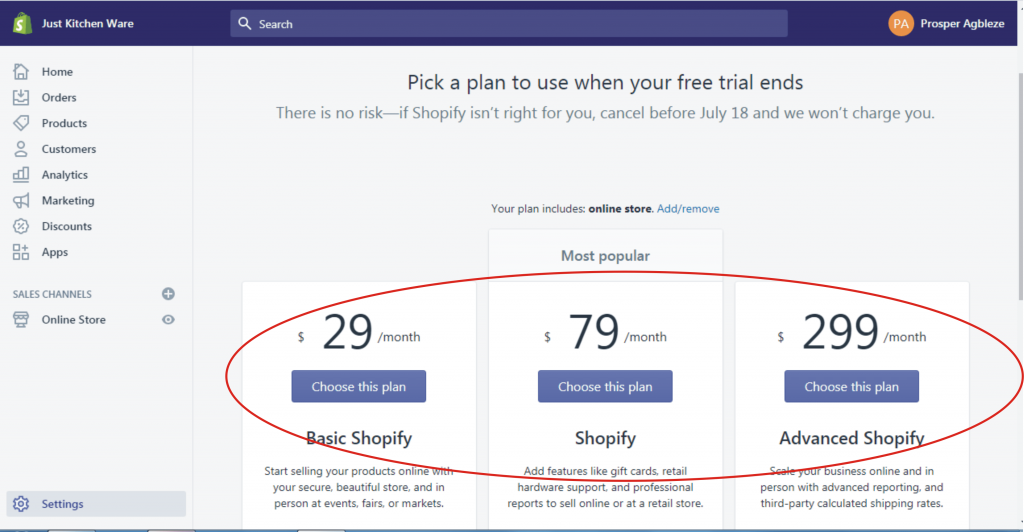
- At the bottom of the dashboard, you’ll see a blue box telling you how many days you have left in your free trial. Next to it is an option to select a plan; click on it
- You’ll pick one of the available plans. It’s important to note that you’ll only be charged at the end of your 14 days free trial
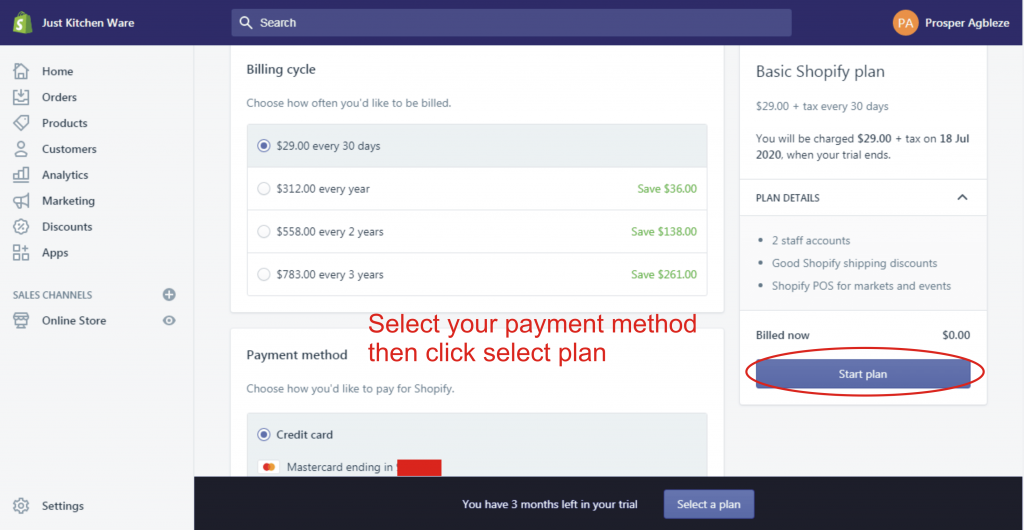
- Confirm your plan by entering your card details then click on start plan
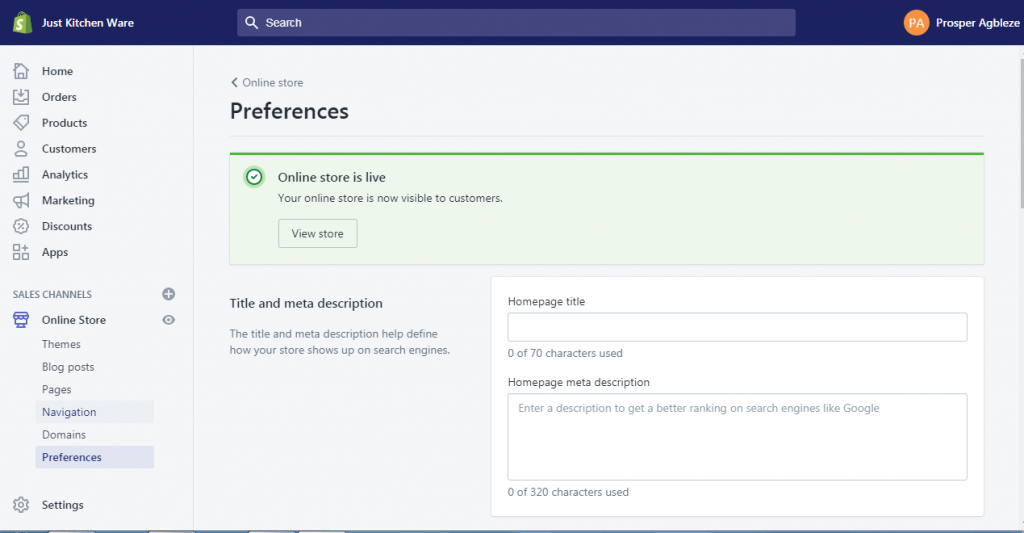
- You’ll be redirected to the preferences page, under password protection. Uncheck enable password then save
- With this, your store will be live and the checkout page will be accessible
How To Add Apps In Shopify:
If you’re familiar with WordPress, Shopify apps are similar to WordPress plugins. They are add-ons that add more features and functionalities to your store.
- On your Shopify dashboard, click apps
- Select the app you want to add and complete the setup
Also Read: Top 10 Recommended Shopify App
Exploring General Settings:
On the general settings, you’ll be able to change store details such as store name, account and customer email, store address, time zone, unit system, and the default weight unit, and store currency. You can also add a currency converter app that converts your store’s currency to the customer’s currency.
Exploring Other Settings:
There are other settings available in Shopify.
TAX: The tax allows you to set up tax. I won’t be writing much about this cause different countries have a different taxing system when it comes to eCommerce and other internet related businesses make sure you do your finding when setting up your store.
ACCOUNTS: Here you’ll be able to add staff with roles to manage the store.
How To Fulfill An Order With Oberlo:
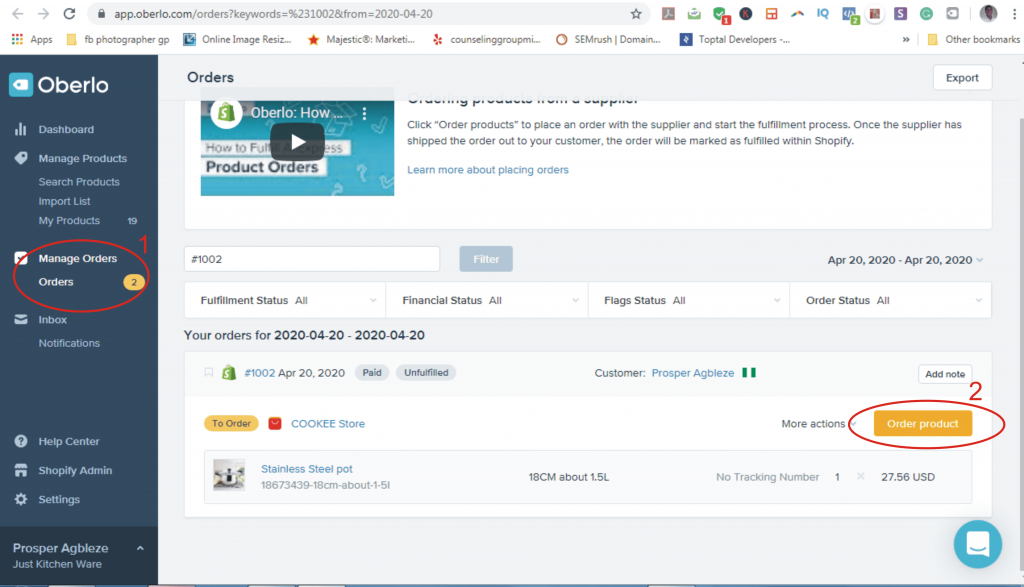
One’s someone makes an order from your store, it will appear on your Shopify dashboard in the Order menu
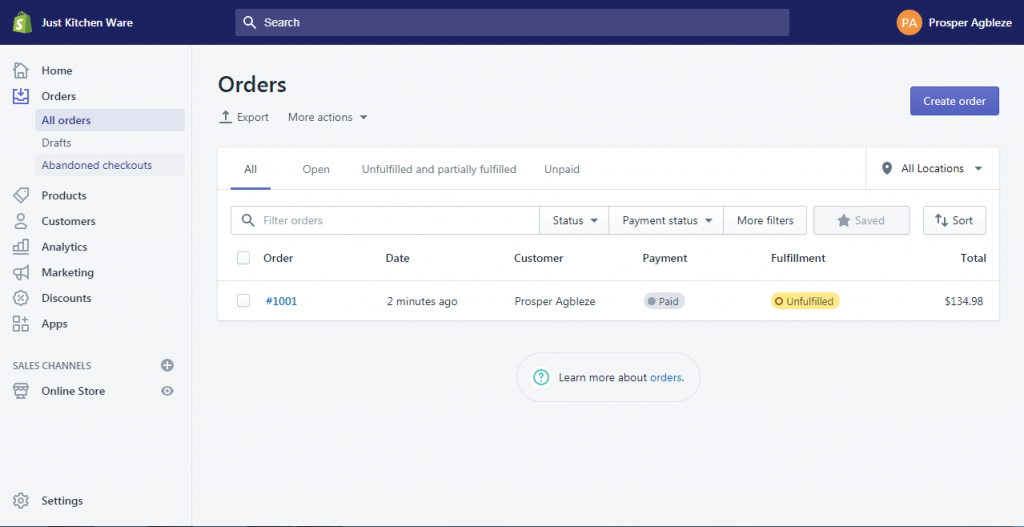
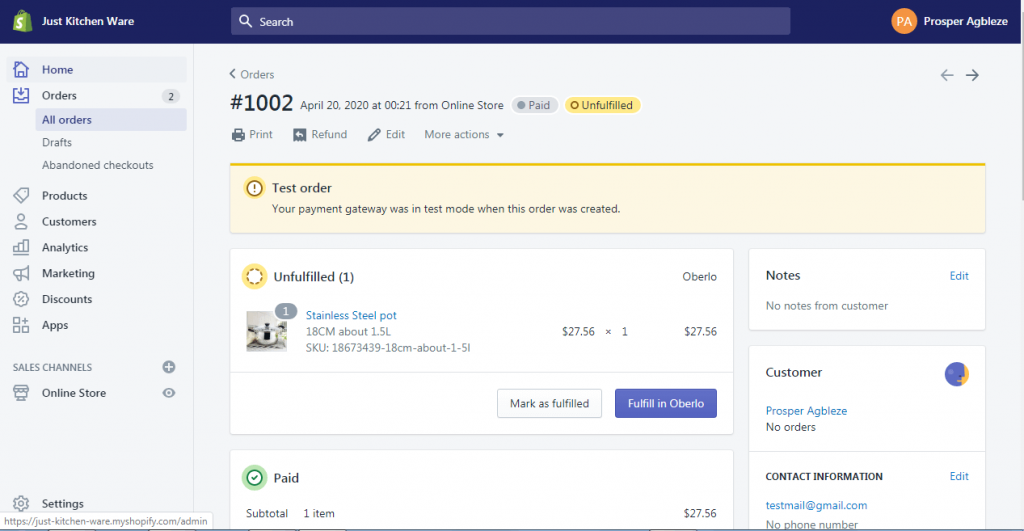
- From the order page on your Shopify dashboard, click on the order
- Click “Fulfill in Oberlo” and it will take you to the oberlo dashboard. (Make sure you have Oberlo Chrome Extension Installed and you’re using Chrome browser)
- On the Oberlo dashboard, click “order product”, and you’ll be redirected to the product page on aliexpress. (Make sure you have an account on aliexpress and you’re signed in)
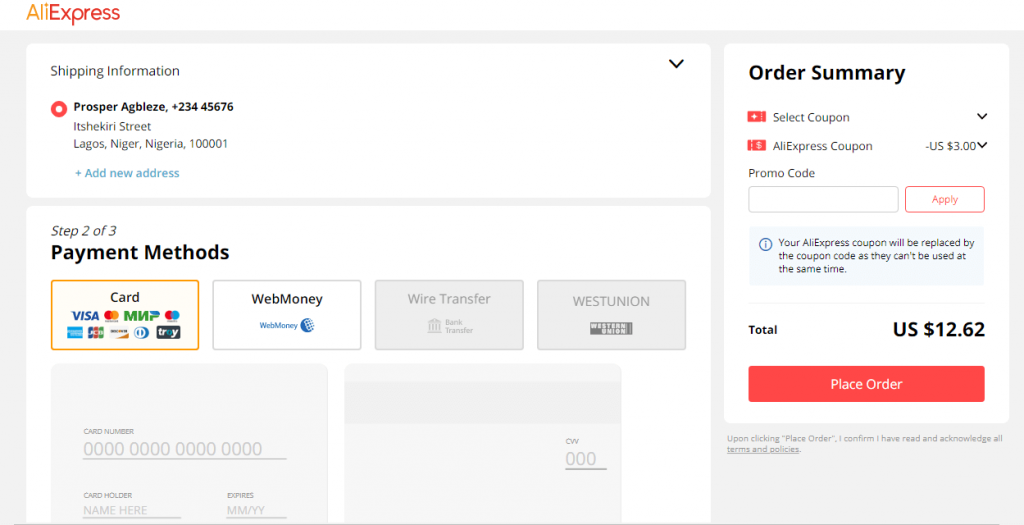
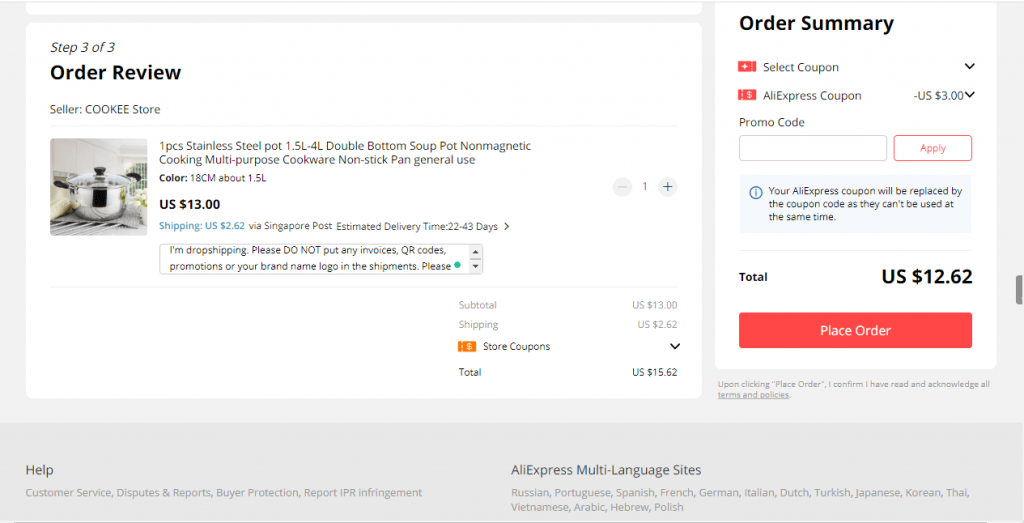
- On the Aliexpress page, the buyer’s details such as address and phone number will be automatically added, a short note will be automatically added informing the supplier not to add any invoice. All these automation is made possible by the Oberlo app.
- Then click “Place Order”
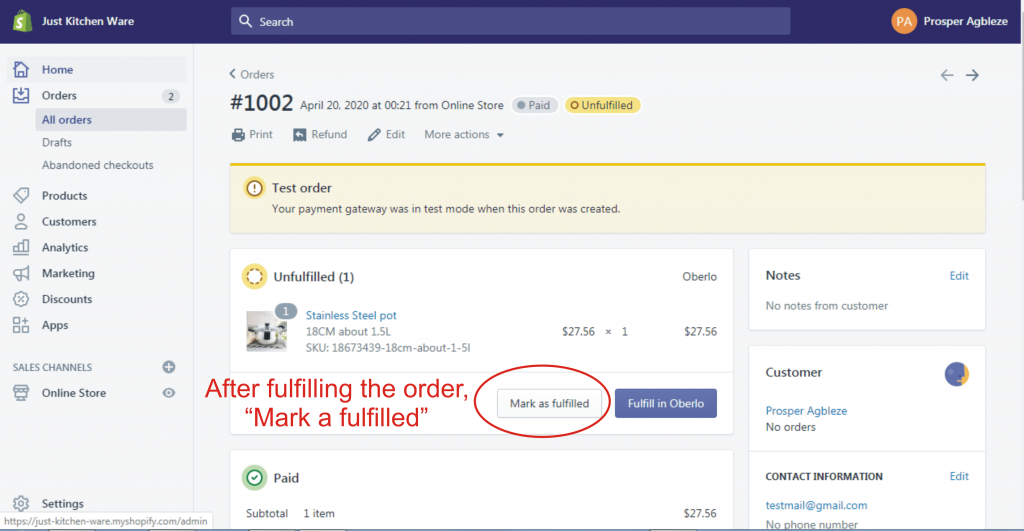
- After placing the order on aliexpress, head over to your Shopify store click on “Mark as fulfilled” to show that the order has been fulfilled.
Now that you’ve read this step by step guide on creating dropshipping eCommerce store using Shopify, click here to sign up and get your 14 days free trial.
In case you have any questions; feel free to leave them in the comment box below. Don’t forget to like and share this post.
Thanks.


