

This is a follow-up post to the tutorial on how to create a Shopify dropshipping store with oberlo where I share step by step guide on how to create a dropshipping store with oberlo. Having created a Shopify store, you’ll need traffic and Facebook is one of the traffic sources for Shopify. Before you can set up a Facebook ad for your Shopify store, you’ll need to create a Facebook page for the store which is what this post will be covering. I’ll be showing you step-by-step with pictures on how to create a Facebook page for the Shopify store.
1. Open you Facebook homepage web.facebook.com (If you don’t have a Facebook account, visit Facebook.com to create an account)
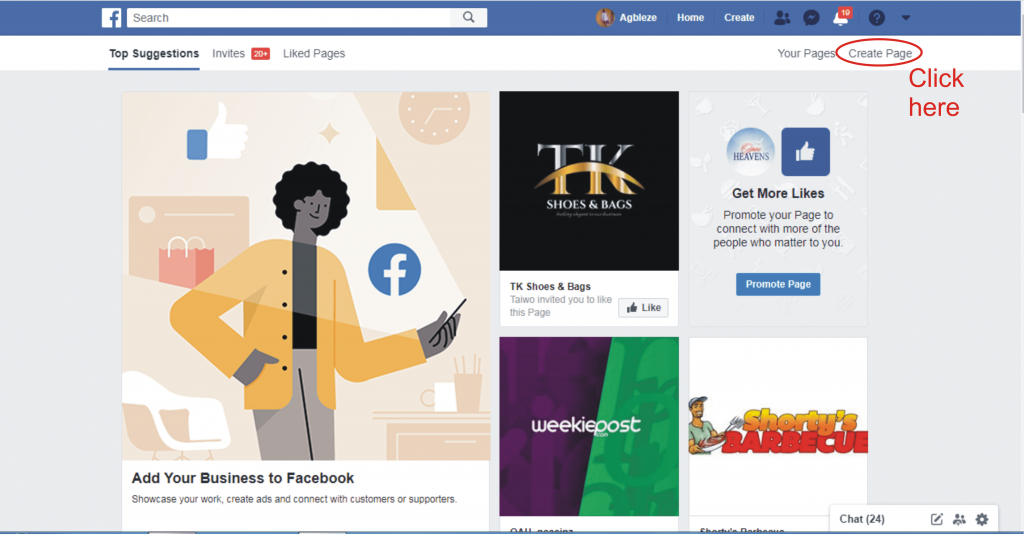
2. On the left side of your Facebook homepage under “Explore” click “Pages”

3. On the upper right, click “Create Pages”
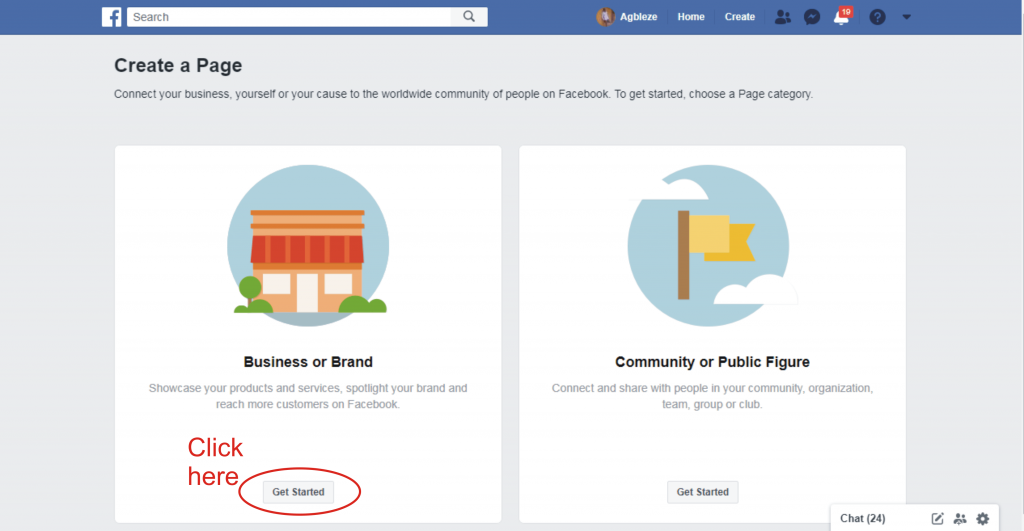
4. From the two options, select “Business or Brand” and click “Get Started”
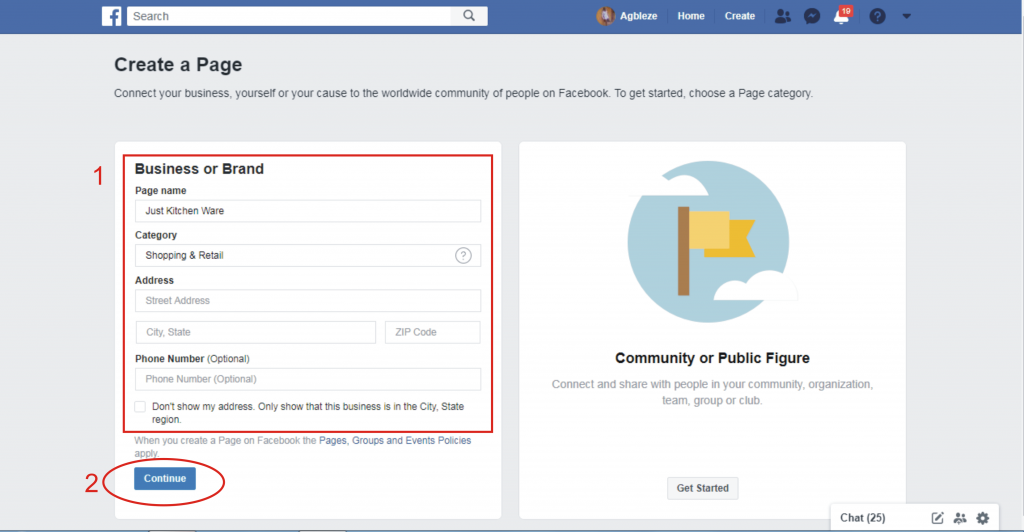
5. Enter your page name (that will be your store name), Enter your category, address, and phone number, and click ”Continue”
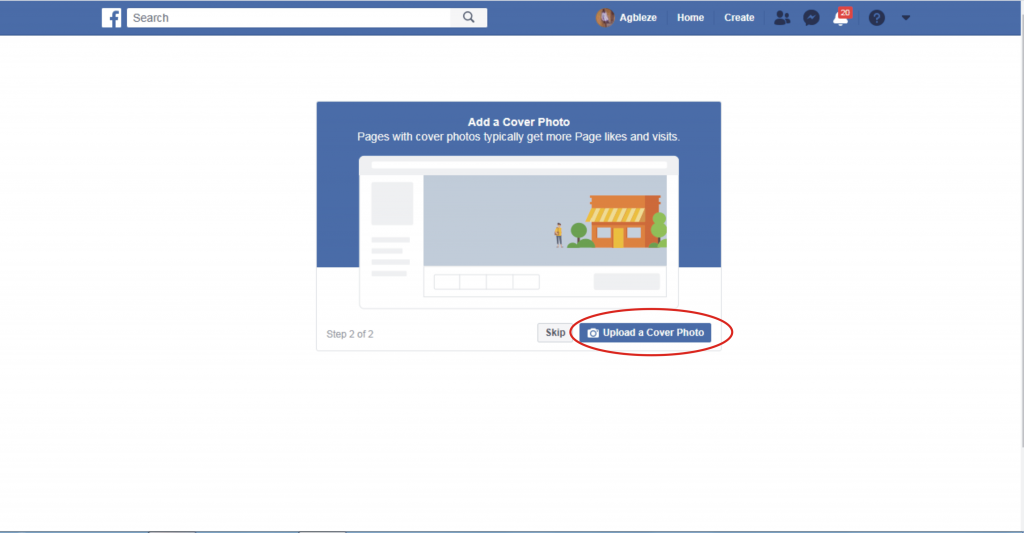
6. Upload a Profile Picture (this will be your store logo) and a Cover Photo. These two are very important. You can design a logo and cover photo on Canva. If you’re not tech-savvy or finding it difficult to design the logo and cover photo, just use a product that describes your store as a profile picture (square) and cover photo (landscape/rectangle/820 pixels by 312 pixels).
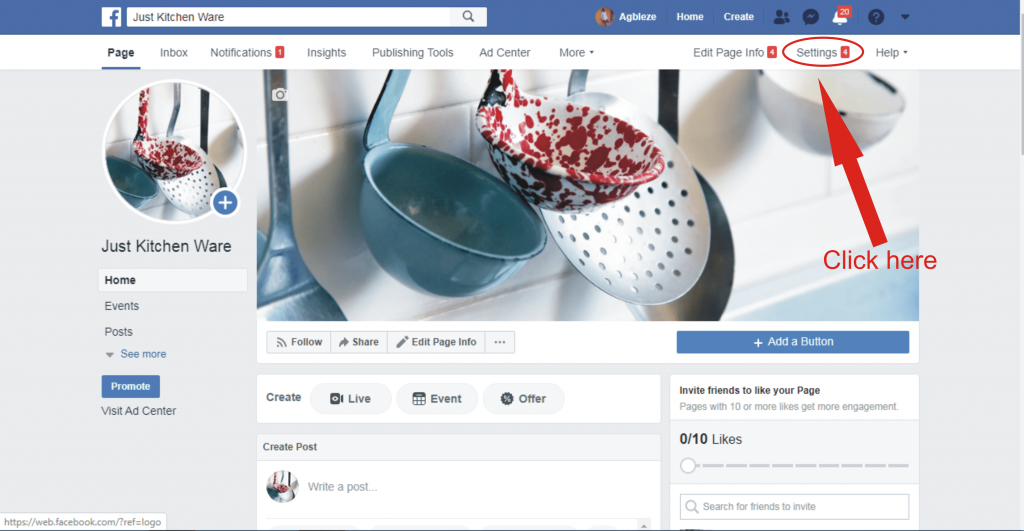
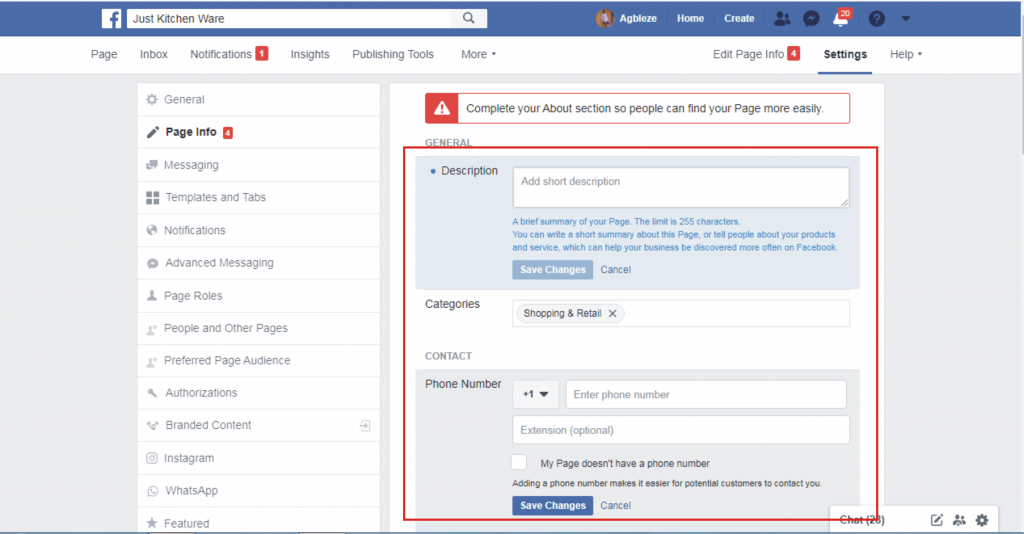
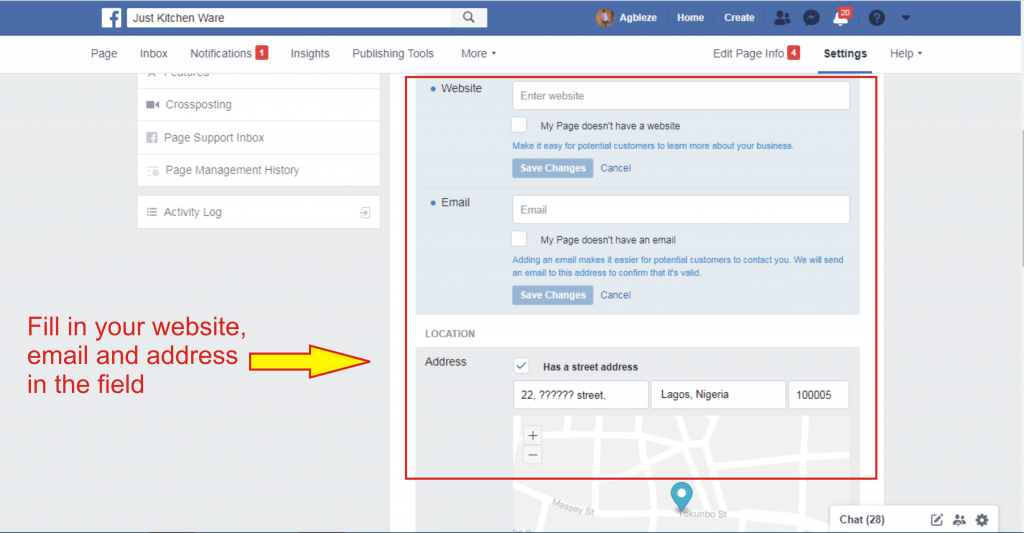
7. You’ll be taken to your Facebook page. At the upper right, click on settings and you’ll be taken to the “Page Info”. Here you’ll add a description, categories, phone number, website (your store website/URL), email, and address. Make sure you save as you enter each field.
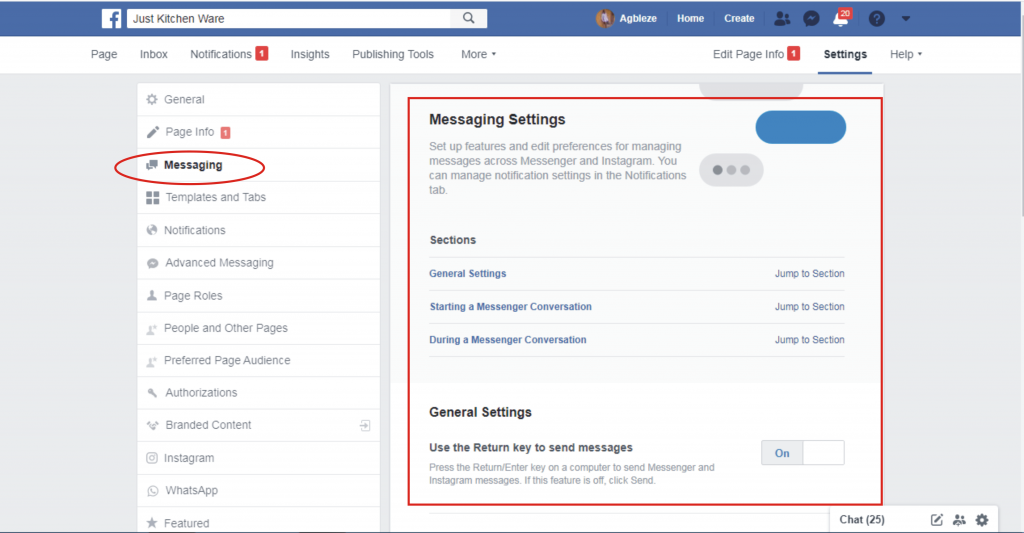
8. There are other settings you can explore such as Messaging
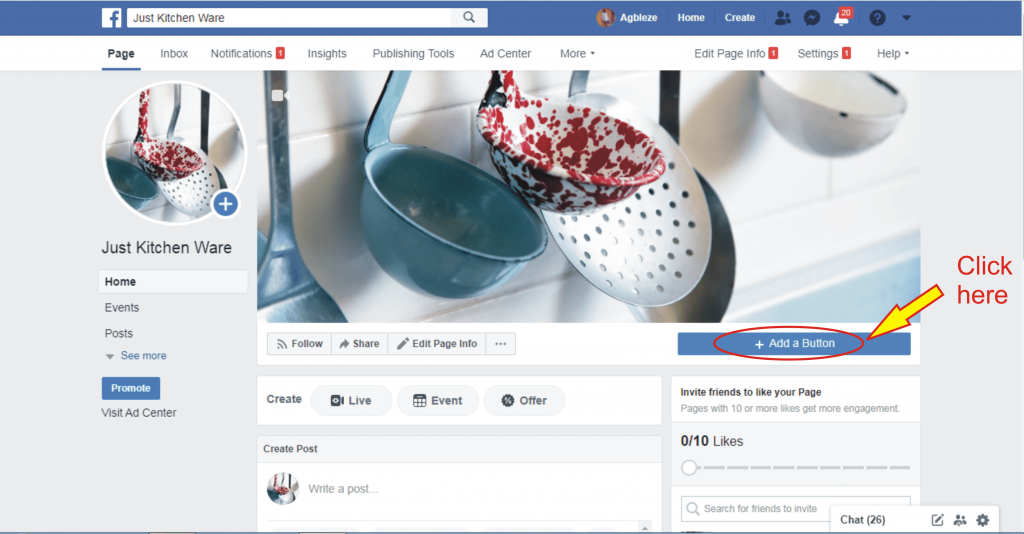
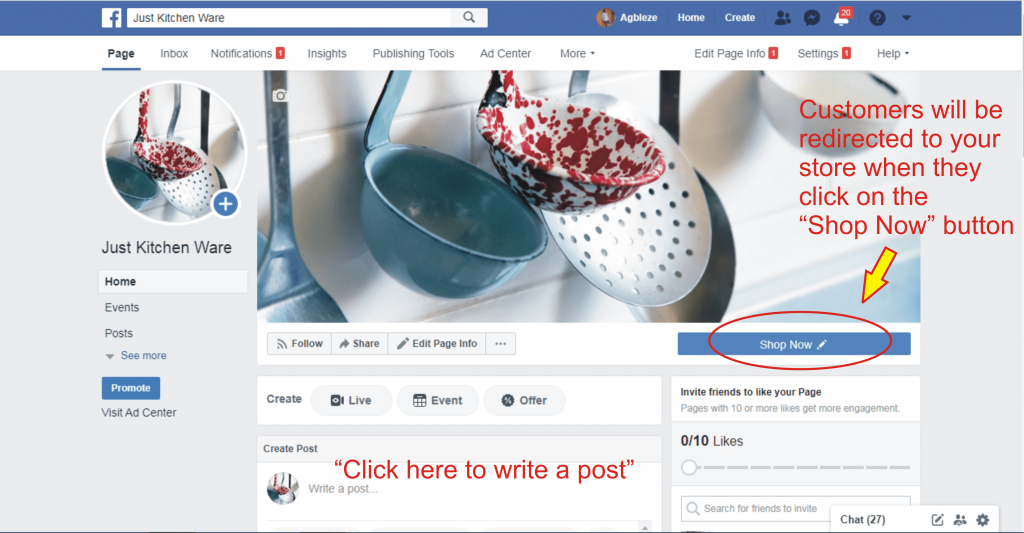
9. Another important thing to do is to add a Shop Now button that will redirect a visitor to your store from your Facebook page
10. From your page home screen, click “Add a Button”. It is below the cover photo on the right
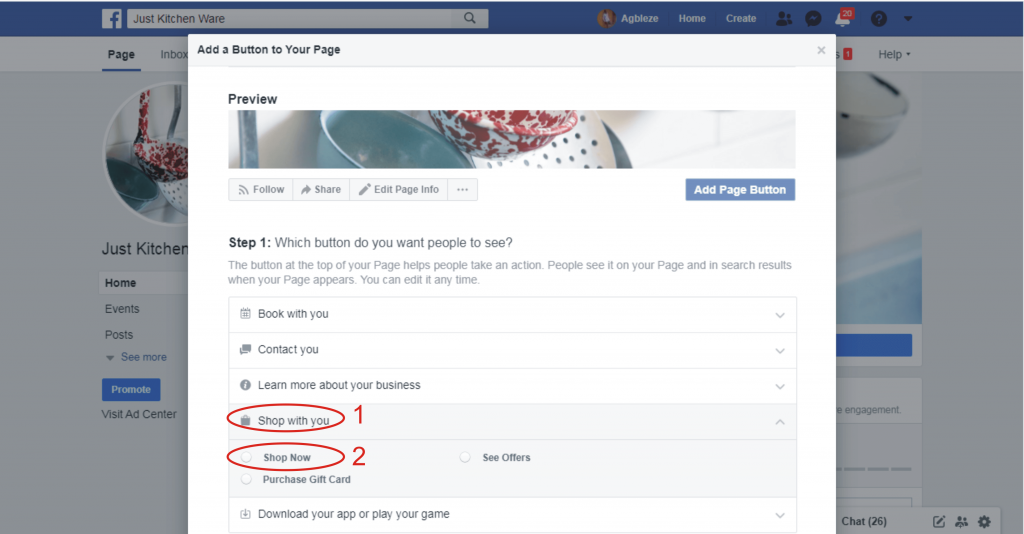
11. Select “Shop with you”. From the drop-down, select “Shop Now” then click “Add Page Button”
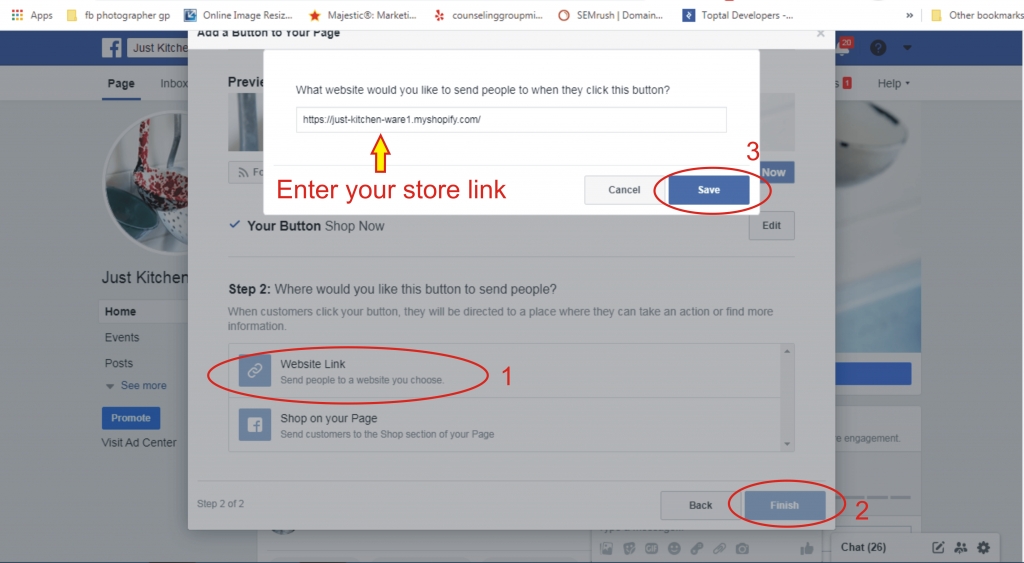
12. On the next page, select “Website Link”, enter your store URL, save then finish.
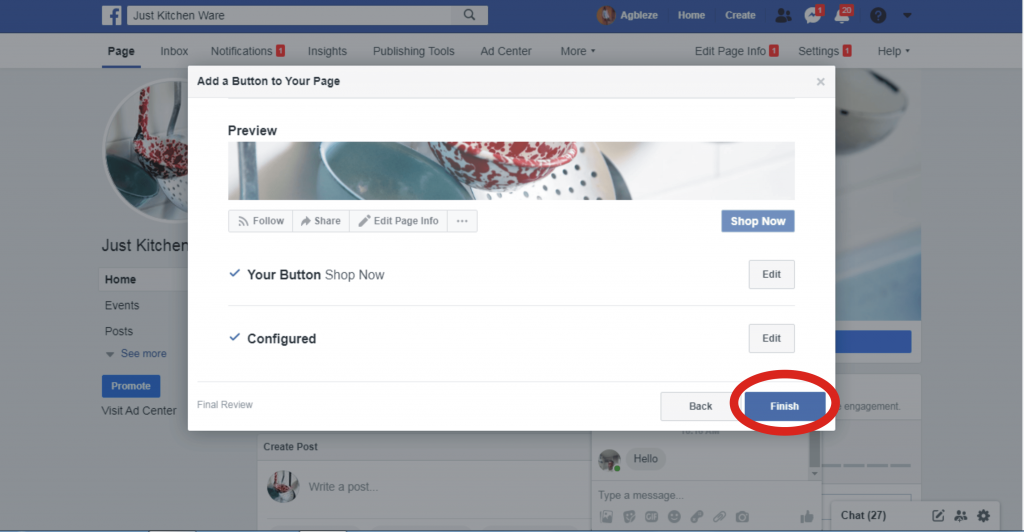
13. Now you’ve successfully created a Facebook page for your store.
14. To create a post, click “Write a post”. An important thing to note when creating a post. Add a call to action (CTA) to your post, shorten the product link using bit.ly, and add a picture to your post.
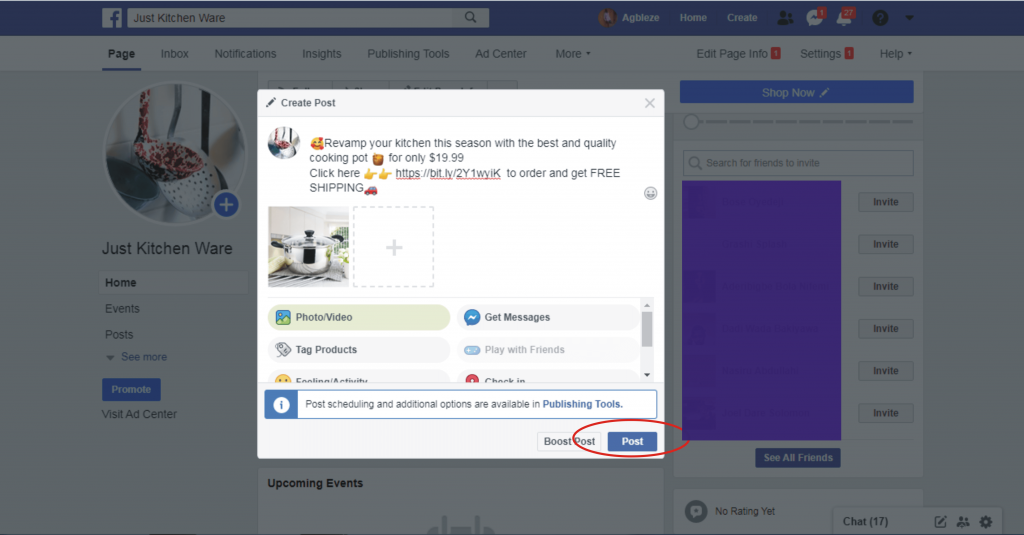
15. When done click “Post”

That is how to create a Facebook page for your Shopify store. If you’re yet to create your dropshipping Shopify store, check out my step-by-step guide on how to create a Shopify dropshipping store.
If you have any questions feel free to leave them in the comment box below and I’ll be glad if you click on the Share button to share this post.
Thanks


